GDMapp
A downloadable tool for Linux
# INTRO
(Beta version 0.0.2)
GDMapp is a **real-time video mapping software** built on the Godot Engine.
It started as an 'in house tool' for a commisioned project:
https://surreal.asturnazari.com/2025/12/01/penpots-whac-a-mappole-a-floss-intera...
and was presented at the GodotCon 2026 Amsterdam conference:
## Features:
* Corner-based warping system made with shaders
* Multi-channel mixer (8 channels × 2 mixers) with blend modes and alpha support
* Support for images, videos (via GDE Gozen) and NDI
* Single-screen projection system with warpeable elements
* MIDI control for physical hardware (KORG nanoKONTROL2, nanoKEY Studio) <- currently limited support
* Project persistence using `.tres` files
- Add godot .TSCN scenes as sources
# THIS IS OPEN SOURCE SOFTWARE
In this page you are buying a compiled binary of this project, and also supporting the developer to continue with the project.
You will get free future updates and acces to future documentation on how to use it and how to implement your own projects along with this code.
The price may increase in the future, but not once you've bought it.
If you're not interested in supporting the development, you can go to the Codeberg repository and compile it yourself:
[https://codeberg.org/asturnazari/GDMapp](https://codeberg.org/asturnazari/GDMapp)
# ROADMAP NOTES
Next step in my roadmap is to write a simple usage tutorial on how to setup a video mapping with GDMapp
A QA and performance roadmap is planned and published in the codeberg repo. It is not set in stone and may change in the future.
Code is ready to accept UNDO / REDO feature, but it's not fully implemented yet, but in the QA roadmap
# TODO FEATURES
* Allow user to delete sources from project
* Add thumbnail to scene sources
* UI Redesign
* Add PCK/ZIP support to load interactive scenes
* Implement Undo/Redo in all commands
* Add 'about info' in a modal window
# Basic usage (UI description)
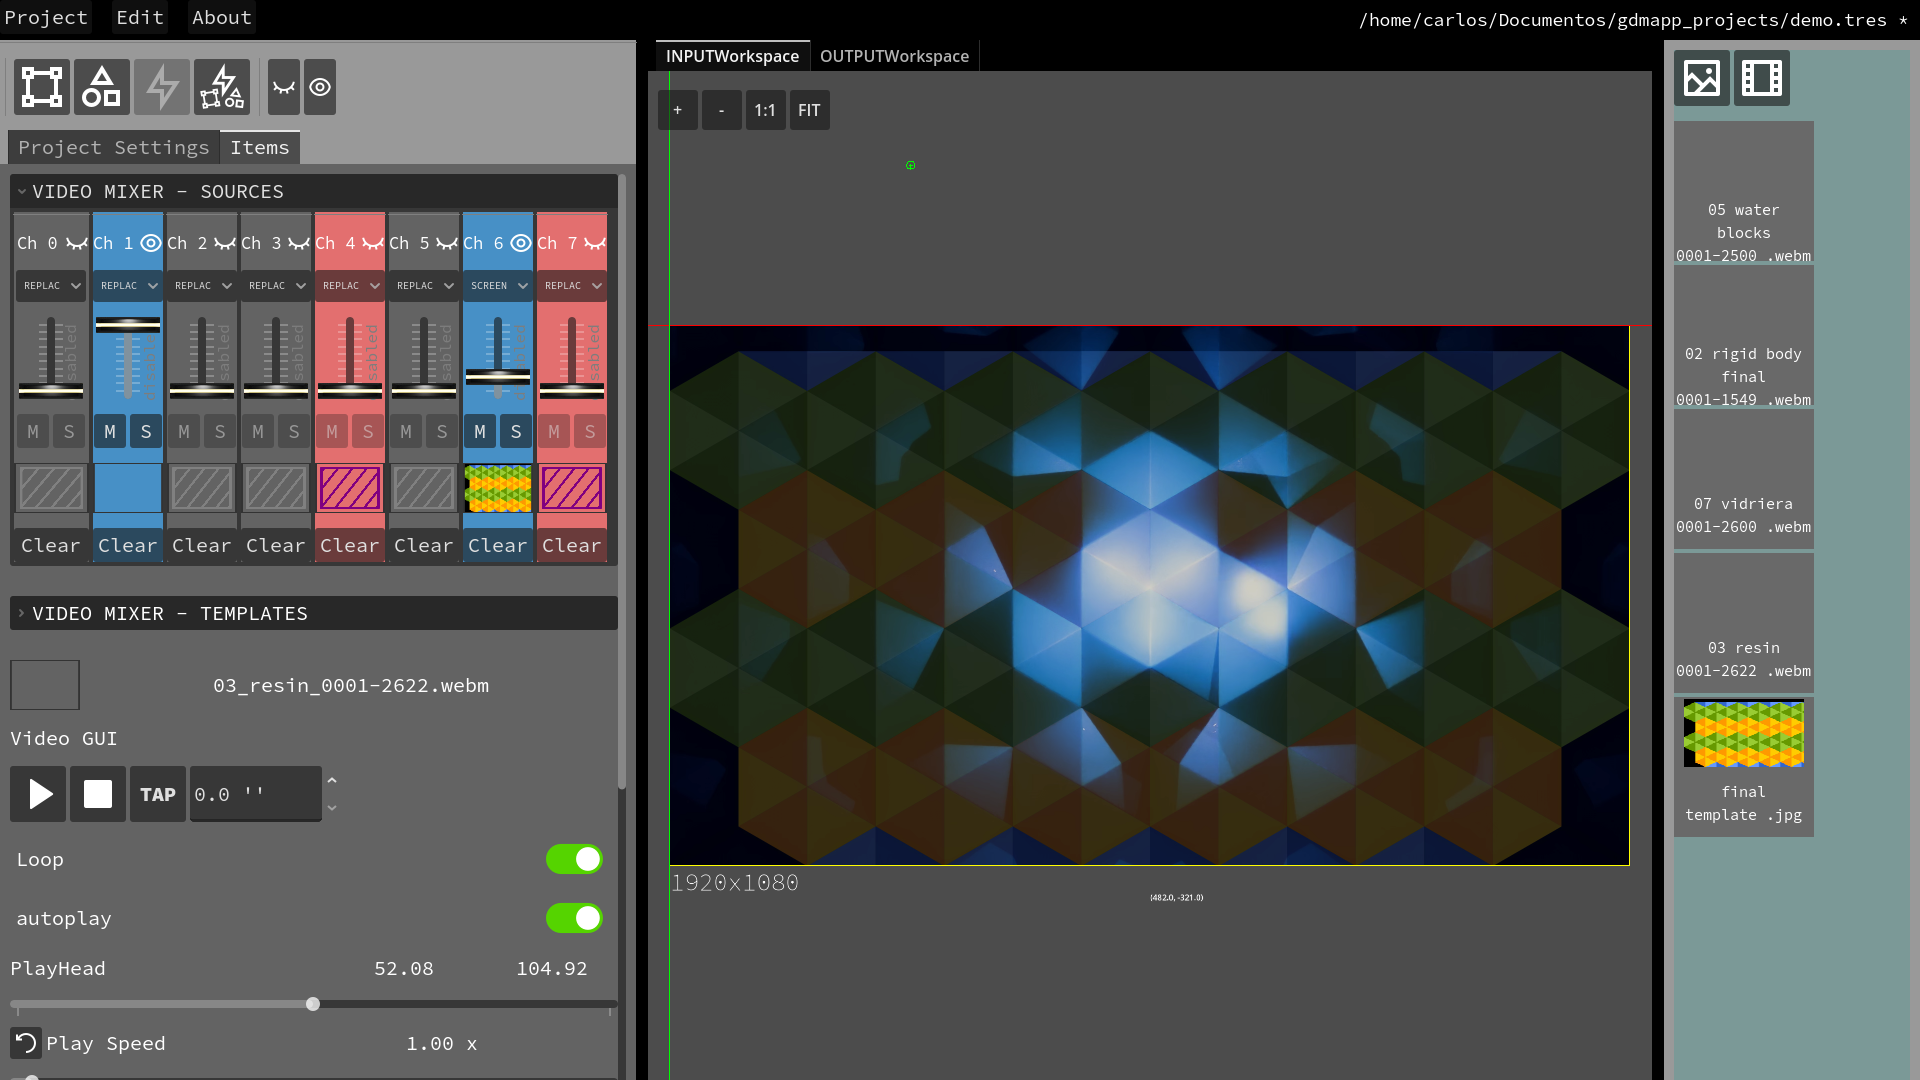
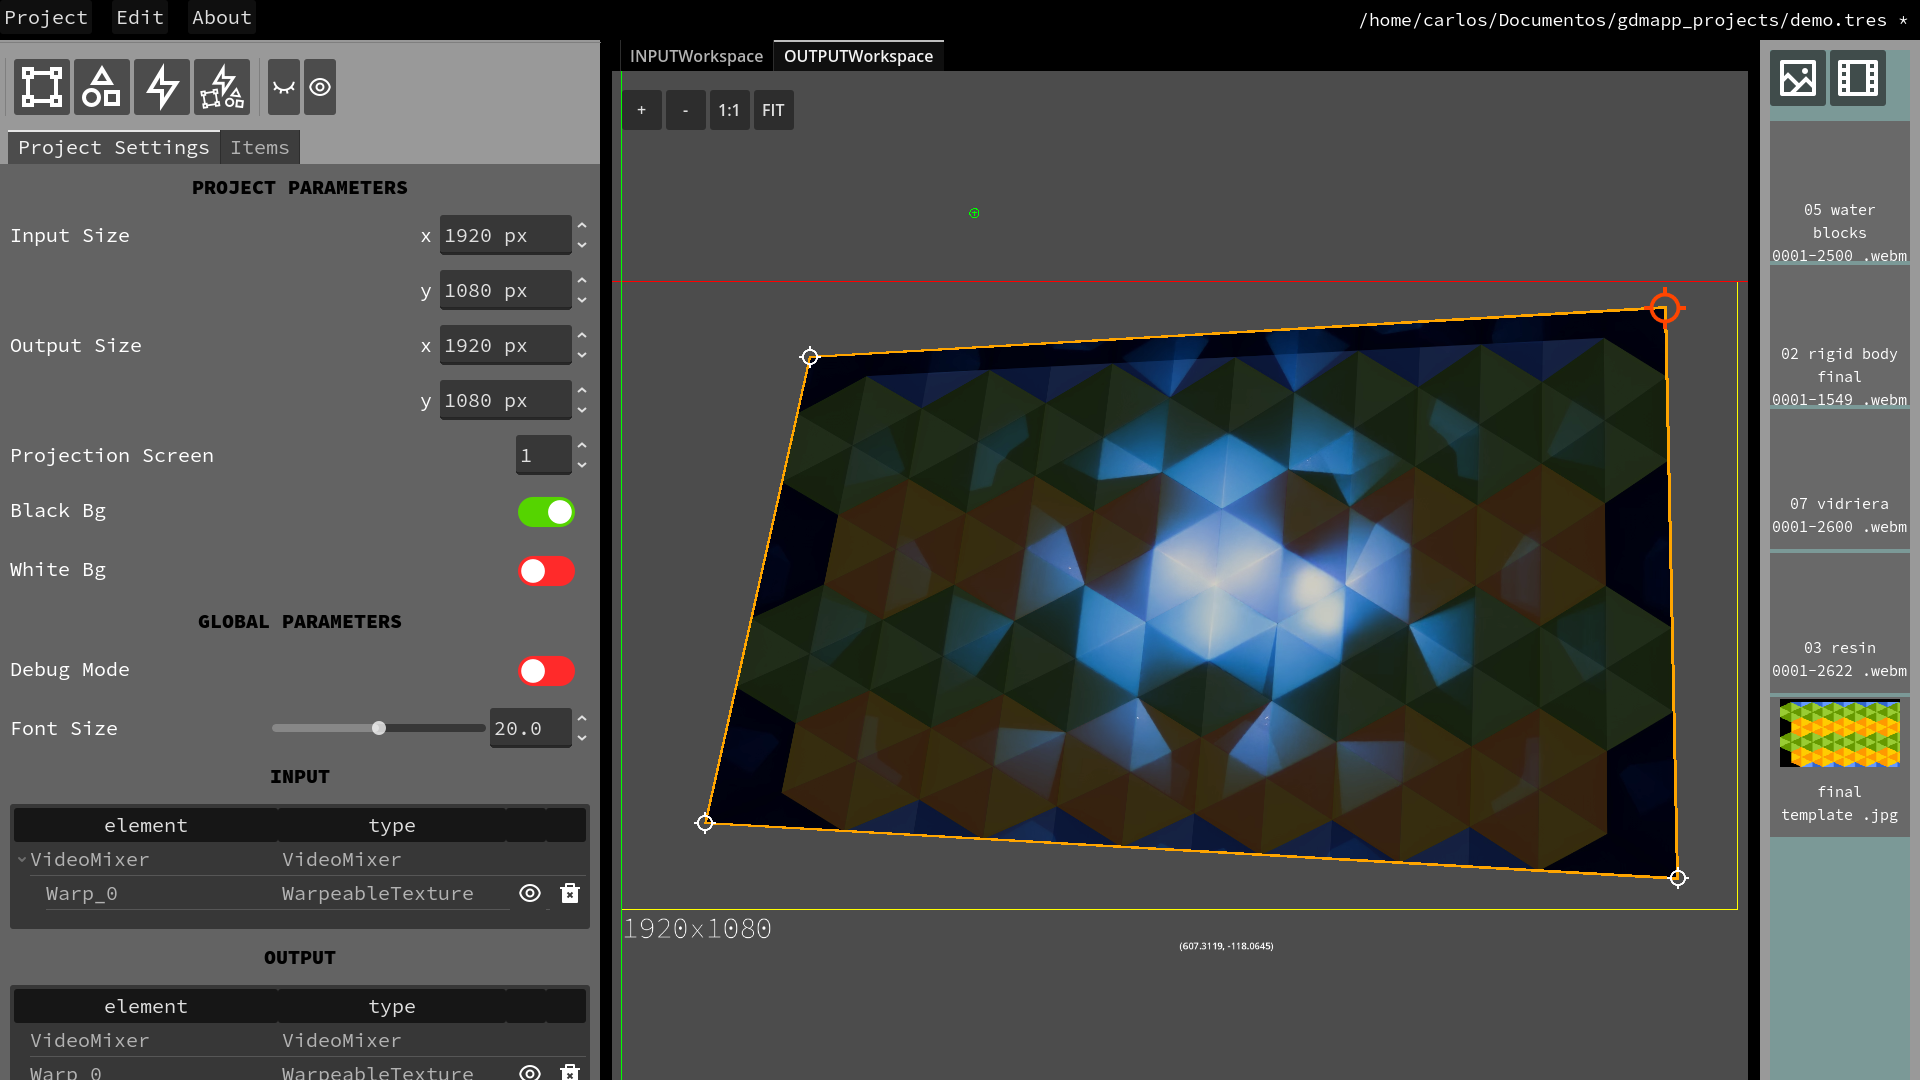
The user interface of GDMapp includes a top bar and three parts split container.
## Top Bar
It includes the main menu and a path to the current project. Also indicates with a * when project has unsaved changes. Some menu entries are not yet implemented.
## Left Container:
It includes a toolbar and two tabs
### ToolBar
From left to right:
* Add warpeable:
It creates a warpeable element that projects all the mixer content into the output workspace. When you click this, a warpeable element is added and the interface switch to the output workspace to let you edit the corners and position of the element
* Add warpeable shape:
This will create a partial warpeable. When you click this, it enters in a draw mode and you can click on the input workspace to define a polygon for your warpeable. Once you double click, press enter or close the polygon, a warpeable shape is created and the interface switches to the output workspace to edit the corners and position
* Show and hide all warpeables
Simple functions to help working with a lot of warpeable shapes. You can show and hide the elements individually in the tree menu.
* Toggle Edit Mode
This is a shortcut and visual reminder for the edition mode parameter. Please, read below in the project settings section. This button will blink in orange color when projection is on and edit mode is also on, to recall you to switch it off during performance.
* Toggle projection
This button toggle on/off the projection to the monitor set in the project settings.
### Project Settings Tab
Here are the main project settings as the resolution, projector monitor and a tree with current project elements. You can click on tree elements to select them and edit their properties
Most parameters are easy to understand.
There is a Edition Mode parameter in the project settings tab. This locks / unlocks some editing features like zoom in the workspaces or modify the warpeables. It's crucial to avoid modifications in the middle of a performance. Be careful it doesn't lock all editing features for the project, just the ones that may be critial.
> ⚠️
> It is recomended to set this Edit Mode parameter off when you are ready to play your mapping performance. This option will improve overall performance of the app.
### Items Tab
## Right Container
Here you have all sources of your project. You can drag and drop this elements to the mixer channels.
Click the buttons above to add images, videos, ndis or Godot scenes as sources for your project.
To load interactive scenes, you need to create a subviewport with your scene inside. Be sure to test it can work independently inside a Subviewport Container, but do not include the container in your scene.
> 🚨
> If you want to add godot scenes to your project, include the scenes in the source code and load them in your project. In the future we will add PCK / ZIP support to avoid this workaround
## Center container:
It has two tabs, one for each workspaces
### Input Workspace:
In this workspace the user can:
* Add visual elements to compose the piece
You can tho this by dragging your sources thumbnail to a mixer channel. Once they are there, you can edit their properties by clicking on the thumbnail of each channel.
* Create warpeable elements to configure how this workspace is projected into the output workspace
### Output workspace
This workspace is where warping happens, the content of this canvas is cloned into the projection output when it's activated.
# GDMapp internals
## GDMapp Resources
* Project Resource
This is the main resource, that stores the project settings.
* Mixer Resource
Each mixer can stack up to 8 channels and mix them with blend modes. Each project has two mixers, one called Sources_Mixer and another one called Templates mixer. In between of them it will be possible to stack different effects. Templates mixer are supposed to be used for images you don't want to be affected by this effects, i.e. the templates of the surface you need in the warping process.
And you can import images, videos, scenes and ndi players inside the mixer channels.
* Image Resources
* Video Resources
* Scene Resources
* NDI Resources (not implemented yet)
* Audio Resources (not implemented yet, not sure about)
All this elements are saved in a folder next the project resource file.
## GDMapp Components
Nodes associated with GDMapp Resources, intended to be nested into the input workspace as single elements or into one mixer channel.
This components provides their own GUI elements to control and customize.
## GDMApp GUI Components
This are the associated gui elements for each GDMapp component. They appear in the Left Container when a component or a mixer channel are selected.
Purchase
In order to download this tool you must purchase it at or above the minimum price of $5 USD. You will get access to the following files:
Development log
- Added toggles for Edit Mode and Projection53 days ago
- Add Interactive Scenes to your project55 days ago
- First Release: Beta Version 0.0.163 days ago
Leave a comment
Log in with itch.io to leave a comment.